Translate

Sunday, October 10, 2021

Cheers for FMS506


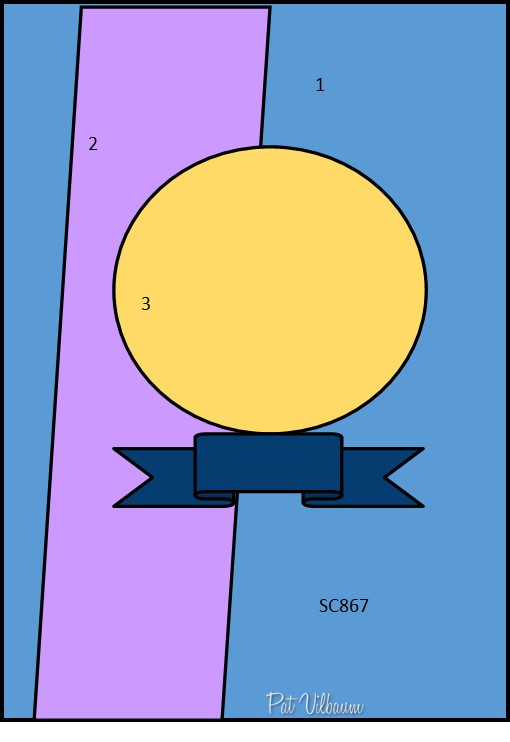
Made this card for Challenge #506 at Freshly Made Sketches. I already had the beer stein inked up from some time ago, complete with a frothy top and a glossy-accented shiny mug. After cutting the background panel, I only had just enough left over paper to cut one circle the size I needed, so I was too afraid to stamp the pretzels directly onto that piece, thinking I may ruin it. Instead, I simply stamped the pretzels onto smaller scraps of that same background paper and only fussy cut the outside lines. I then tucked them underneath the beer stein. Added the few dp stripes, a black sentiment and matted the beer stein circle onto a black circle to make it pop. I just loved this sketch...so fun! Thanks for the inspiration!

Supplies Used:
Stamps: Riley & Company: Beer Stein; Stamps by Judith: Pretzel
Dies: Penny Black: Cheers; Spellbinders-Nestabilities: Circles, MFT Stitched Circle Stax , MFT Stitched Rectangles
Paper: Park Lane: Industrial; Basic Grey: little black dress
Other: Copics, Glossy Accents

Friday, August 27, 2021

SC868


Another card made using a sketch at Splitcoaststampers for inspiration. Found an old panel that was created on watercolor paper using distress oxide inks with an attempt at reverse embossing. I thought it made a nice background for a few colorful butterflies. Used the leafy stems from the Beautiful Day stamp set to mimic the triple circle design of the sketch. Added a sentiment in cheery yellow, matted the panel in green and this card was done! Thanks for stopping by!
Sketch Challenge 868 {08/25/2021}-sc868c.jpg
Supplies used: 
Stamps: Recollections: Background stamp; SSS: Beautiful Day
Inks: Distress Oxides: Piacked Raspberry, Salty Ocean, Squeezed Lemonade; Memento: Tuxedo Black; Copics
Dies: SU: Beautiful Wings Embosslits; Spellbinders: Sentiments One

Wednesday, August 25, 2021

Summer Birthday SC867

It's becoming more of a challenge for me these days to 'design' birthday cards for the same people I've been sending cards to for so many years now. How many times can you use the 'typical' birthday elements like cakes and balloons? Then I had a fun idea: why not use a theme to correspond to the time of year instead? Since it's still summer, it seemed just right to pull out those flip flop stamps once again and celebrate both the birthday and the season! (Ironically, I did not realize that my last post here was for a flip-flop birthday card at the very beginning of summer. Good thing this card is for a different relative!!) 

The card came together quickly thanks to the Sketch #867 (now LAST week's sketch) at Splitcoaststampers. Thanks for the inspiration, Pat! I knew I wanted to use that flip-flops dp for the strip, and the flip flop stamps for the center element. When I pulled out the stamp set, I decided to add the waves to the bottom of the circle. For the sentiment strip, I tried (unsuccessfully) to create a fish tail on the other side, but it came out all wonky so I decided to let it be a straight edge. Added a few star fish (stamped and fussy-cut) which finished off this card. Thanks for stopping by!


Supplies Used: 
Stamps: TSOL: flipflops2stamp
Dies: MFT: Stitched Circle Stax; Spellbinders-Nestabilities: Circles; Sunny Studio: Fancy Frames Rectangle
Paper: The Paper Studio
Ink: SU: Pumpin Pie; Distress Oxide: Tumbled Glass; Hero Arts: Unicorn White; Altenew: Maple Yellow


Saturday, May 29, 2021

Dots, Dots & more Dots


I started this card by applying distress oxide inks over the Flowing Drops Stencil from Altenew. Then, matching the dotted paper that is behind the stenciled panel, I used Altenew's Halftone Stencil over the first stencil. I stamped the flip flops with the lighter ink and created the polka dots by applying darker ink using the Halftone Stencil again. The pink scalloped circle was die cut from more dotted paper and of course i couldn't let the white circle be plain, so I embossed it with more dots! The little star fish added a nice touch to the circle, and a few sequins added a little more pop to the background. Thanks for stopping by!


Supplies Used: 
Stamps: The Stamps Of Life: flipflops2stamp; Simon Says Stamp: Sending and Wishing and You Matter
Inks: Distress Oxide: tumbled glass, mermaid lagoon, picked raspberry, fossilized amber
Dies: Spellbinders-Nestabilities: Scalloped Circles; MFT: A2 Stitched Circle STAX; Simon Says Stamp: Wishing
Other: Altenew: Flowing Drops Stencil and Halftone Stencil; The Paper Studio: A2 Medium Polka Dots Embossing Folder; Sequins

Friday, May 28, 2021

Flowing Drops with Azaleas

Happy Accidents. We don't make mistakes, just happy accidents. That's what Bob Ross used to say when we would think 'oh no he made a mistake!'. Well, here I was apply ink through my stencil when it moved slightly. The result: a happy little accident! Some of the drops have extra dimension because the stencil shifted. I blended two shades of yellow distress oxide ink to make the background. I colored the Azaleas with my copics and mounted them to a green oval laid into a white oval outline. After die cutting the sentiment, I used a white gel pen to create some highlights. Added Nuvo Drops to finish this card. Thanks for stopping by!

I'm adding this card to the following challenges:

Challenge # 603 - Say it with Flowers at Little Red Wagon


Supplies Used: 
Stencil: Altenew: Flowing Drops
Dies: Spellbinders-Nestabilities: Classic Ovals; Lawn Fawn: Scripty For You
Stamps: Power Poppy: Azalea
Ink: Distress Oxide: squeezed lemonade and fossilized amber; Copics
Other: Nuvo Drops: Apple Green


Tuesday, April 13, 2021

A bit of Graffiti x 2


Another not-so-young but not-so-old nephew... graffiti design to the rescue! I fell in love with these series of stamps such a long time ago...it was fun to pull them out once again! My color scheme includes a shade of purple - here seedless preserves - as that is a favorite color of said nephew. Added a blue, a teal and a few pops of black. Made three backgrounds, and I have to say, the hardest part of these kinds of cards is that I fall in love with the backgrounds then hate to cover them up (or horror! cut them up!). I think I may actually add Very Little to the last background....but for now, it will reside in my 'to be finished' stash. Sadly, it will have lots of company there!

Once I had the background done, I created another strip of graffiti elements that I then cut into a fishtail end. After I created the sentiment strip, I added an arrow to help direct your eye to the sentiment. Because I just cannot do two things exactly the same, I used two different arrows on my cards. A very small difference, but that serves as a reminder of how indecisive I can be - a trait that adds unnecessary time to my cardmaking! Thanks for visiting my blog!


Supplies Used:
Stencils: Altenew: Splatter Stencil; Sugar Pea Designs: Concentric Circles  
Stamps: Hero Arts: Brush Strokes; Darkroom Door: Coffee Stain; Sugar Pea Designs: Greatest Hits, Stamps By Judith and Heather: Dots
Ink: Distress: Seedless Preserves, Chipped Sapphire, Evergreen Bough; VersaFine: Onyx Black; VersaMark
Other: White Fine Embossing Powder


Red Grand Slam Card


My fourth and final baseball card once again came together quickly thanks to the fun Doodlebug dp. Stamped a sentiment in gray under the square which I matted in red. On a separate piece of cardstock, I stamped three alternating rows of the baseball stitching and another pennant using the Grand Slam sentiment this time. Popped up the pennant and adhered this element to the bottom of the card. Thanks for stopping by!


Supplies Used:
Stamps: Power Poppy: Play Ball!
Ink: Memento: London Fog; SU: Real Red
Paper: Doodlebug Design: Home Run Collection

Sunday, April 11, 2021

Baseball Allstar Card


My third baseball card utilized a baseball diamond square cut from the playful Doodlebug dp. I cut a coordinating green strip in two to border either side of the diamond then added strips of green washi tape. Once again, elements were stamped from Power Poppy's Play Ball! Stamp Set. For the bottom element, I carefully cut out just the one bat and mitt from the more complex stamped image and colored them with colored pencils. I also used another image from the set for the top element and sentiment. Finished this card off with two green star brads. Happy Baseball Season! TFL!

Supplies Used:
Stamps: Power Poppy: Play Ball!
Ink: Memento: London Fog; VersaFine: Vintage Sepia
Other: Washi Tape, Brads, Prismacolor: Colored Pencils
Paper: Doodlebug Design: Home Run Collection

Saturday, April 10, 2021

Play Ball!


Here's a second Baseball Card in Cubbie Blue. The cards come together so quickly when you have such fun paper to work with! To enhance it just a bit, I stamped the baseball stitching onto strips of white cs, and added some embossed stars. I cut the words out of a strip of dp, then matted them. To finish, I used dimensional squares to pop up the stars and word strips. TFL!  

Supplies Used:
Stamps: Power Poppy: Play Ball!
Ink: SU: Real Red
Dies: Sizzix Originals: Stars#2
Other: Cuttlebug: Swiss Dots ef
Paper: Doodlebug Design: Home Run Collection

Go Cubs Go!


I just bought the super-fun double-cut alphabet dies from Concord & 9th. I've wanted them for so long but every time a sale would come up, they were out of stock. So happy that Hallmark was able to deliver! The CUBS logo was so easy thanks to those dies as well as two nested circles cut into a 'C'. That Doodlebug dp was so fun to use I just HAD to make a few more cards. Go Cubbies!!

Supplies Used:
Dies: Concord & 9th: Double-cut Alphabet, Spellbinders-Nestabilities: Circles 
Paper: Doodlebug Design: Home Run Collection


Billiards Card

Masculine birthday cards are challenging in and of themselves, but as my 'little' nephews grow up (now in their thirties!!) it is getting harder and harder to find just the right design for their cards. One can make only so many guitar or basketball cards! Luckily my soon-to-be-thirty-year-old son came up with a great suggestion: Pool!

Not having any stamps remotely close to the game, I spent some time googling pool tables, billiard balls, cue sticks, etc. Then I spent more time unearthing every circle die/punch I could find in order to find the perfect sizes for those tiny little billiard balls. All the numbered balls represent my nephew's birthdate and age ('32' on 4/5/89). (I did have to point this out to most, but my clever nephew did figure it out with very little coaching.) One of the trickiest tasks was to make the 'stripe' on the No. 9 ball. The table was easy enough and so was the cue stick. A bit of blue ink for chalk, white pencil for the tip and a few strokes of brown copic markers for the bottom made it look rather realistic. 

A fun card to make and I thought of another good idea for these young adult men: Poker! I'm ahead of the game for next year! YAY!

TFL!


Supplies Used: 
Dies:  MFT: Hot Cocoa Cups Die-namics (larger circle die), standard hole punch (circles for numbers); corner rounder punch; Concord & 9th: Double-cut Alphabet;
Stamps: SSS: You Matter

Friday, April 2, 2021

Celebrating 21st Birthday


Created this card for a nephew who is turning 21. Got my inspiration from Sketch #548 at Just Add Ink. Decided to use various distress inks in masculine colors with my stencil. I usually don't ink up the card base itself, so I don't use 'good' card stock for my card bases. This fact made inking not as easy as it could've been had I used the shinier Ranger Speciality Paper which is much kinder to Distress Inks. I think it still came out okay, though filling in all those tiny spaces was a bit tricky. I used lots of tape for masking! I tried hard to go with a CAS design here, and I think I finally succeeded. I stopped myself from adding more embellishments (like sequins) to keep it clean and also to keep it more masculine-looking. 
I'm also adding this to the Challenge #194: Birthday at Addicted to CASThanks for stopping by!


Supplies Used:
Stamps: Riley & Company: Beer Stein; Stampabilities: Everyday Expressions
Ink: Distress: Chipped Sapphire, Fossilized Amber, Walnut Stain and Fired Brick; Memento: Paris Dusk; Copics
Other: Picket Fence Studios: Point of Interest Stencil, Glossy Accents, Marvy: Snow Marker
Dies: MFT: Stitched Circles; Spellbinders-Nestabilities: Labels One

Monday, March 29, 2021

Butterfly Splatters


Made another card for the PCC419 Sketch Challenge at 
Paper Craft Crew. Inked up my Butterfly Splatter Stamp with Daffodil Delight, and stamped the TSOL Sentiment with Pumpkin Pie Ink. Cut the white oval then matted it with another oval using the Designer Paper from Stampin' Up in Bermuda Bay. Die cut a few butterflies with the Beautiful Wings Embosslit using more of the dp in Daffodil Delight and Pumpkin Pie. Added a strip of Bermuda Bay for the final element of the sketch. This is such an easy card to put together - I think I'm going to make several more with different combinations of Brights. Thanks for looking!


SUPPLIES USED:
DIES:  Spellbinders-Nestabilities: Ovals; Stampin' Up Embosslits: Beautiful Wings
STAMPS: TSOL: crazy4daisies, Your Next Stamp: Butterfly Ink Splatter
INK:  Stampin' Up: Pumpkin Pie, Daffodil Delight
PAPER: Stampin' Up: Brights Designer Series Paper Stack


Dotted Birthday


Made this card using the sketch for this the PCC419 Sketch Challenge at Paper Craft Crew. Inked the sides of the oval with Distress Oxide Inks using a dotted stencil, cut an oval outline in order to give the card more white space (so that it could be entered in Challenge #439 - CAS Inking at Less Is More ). Added a few die cuts in bright colors and stamped the sentiment with the much-loved Stampin' Up Tempting Turquoise. Not sure if this quite qualifies for Less is More, but this is quite the challenge for me and I will continue to keep trying to get there! Thanks for stopping by!


SUPPLIES USED:
DIES:  Spellbinders-Nestabilities: Ovals; ODBD: Balloons & Streamers; Sizzix Originals: Gifts
STAMPS: TSOL: crazy4daisies
INK: Distress Oxide: Broken China, Fossilized Amber; Stampin' Up: Tempting Turquoise
PAPER: American Crafts; The Paper Studio
STENCIL: Altenew: Halftone Stencil

Tuesday, March 23, 2021

Tempting Turquoise/Gold Flower Power (4 of 4)


This is the third card that I am adding to the Wednesday Card Challenge - Two or More Patterned Papers at Simon Says Stamp. I really had fun making all of these different cards using those cute little freebie flower stamps! Now I definitely need to switch back to my obligatory birthday cards because I need at least 10 for April & May! Thanks so much for stopping by!

SUPPLIES USED:
DIES: MFT: A2 Stitched Rectangles STAX; Spellbinders-Nestabilities: Labels Eleven
STAMPS: SSS: Beautiful Day; Picket Fence Studios: Flowers For Picking; Fiskars: Friendly Flowers
INK: Stampin' Up: Tempting Turquoise, Old Olive
PAPER: Stampin' Up and various
OTHER: Nuvo Crystal Drops: Calming Aqua

Tempting Turquoise/Gold Flower Power (3 of 4)


Adding another card to the Wednesday Card Challenge - Two or More Patterned Papers at Simon Says Stamp. For this card, I used the Scalloped Squares Dies and rounded the corners of the sentiment and background panels. The sentiment is from TSOL. To add interest, I cut thin strips of the patterned olive paper and matted them onto the olive cardstock. The pattern looks so different when you cut it in thin strips! Thanks for stopping by!

SUPPLIES USED:
DIES: Spellbinders-Nestabilities: Scalloped Squares
STAMPS: TSOL: monogram2build; Picket Fence Studios: Flowers For Picking; Fiskars: Friendly Flowers
INK: Stampin' Up: Tempting Turquoise, Old Olive
PAPER: Stampin' Up and various
OTHER: Nuvo Crystal Drops: Bright Gold


Tempting Turquoise/Gold Flower Power (2 of 4)


Since I had a few extra stamped/cut flowers and all the extra paper still out on my craft table, I decided to make more cards. I spend most of my crafting time making cards that I 'have to' make - the calendar dictates who gets a card - so I don't often get the chance just to 'play'. With the supplies all out and all the color choices made, all I needed was a sketch to get me started. Once again, Splitcoaststampers came through with SC845! 

For this card, I added some leaves that I stamped and fussy-cut. The sentiment is from MFT's You're The Sweetest and the stitches were added to the sentiment strip by using my stitched rectangle dies and carefully cutting one edge at a time using a longer but much wider rectangle die. Love the added touch the stitch marks bring! 

I found two more coordinating patterned papers, so this card will be entered into the Wednesday Challenge at Simon Says Stamp. Since it is also a birthday card, it will be entered into the Game #23 - Patterned Paper Birthday Challenge at AAA Birthday.  Thanks for looking!


SUPPLIES USED:
DIES: MFT: A2 Stitched Rectangles Stax 
STAMPS: MFT: You're The Sweetest; Picket Fence Studios: Flowers For Picking; Fiskars: Friendly Flowers
INK: Stampin' Up: Tempting Turquoise, Old Olive
PAPER: Stampin' Up and various
OTHER: Nuvo Crystal Drops: Bright Gold

Tempting Turquoise/Gold Flower Power (1 of 4)


Received these adorable flower stamps for free with my recent purchase at Scrapbook.com and when I found this old paper in my stash,  I just had to use them! I stamped a whole bunch of these cute little flowers with Tempting Turquoise Ink. Since the ink matches the paper, I stamped several times using my MISTI in order to make the outline darker. I never stamp without using that wonderful tool - it has made stamping accurately so much easier! 

I fussy-cut the flowers and added some Nuvo drops for just the right amount of shine. Fussy-cutting these was not difficult at all! I die cut the beautiful edges border from Altenew out of Old Olive paper. Used that same color along with a lighter turquoise for my die-cut circles, then adhered everything using Gina K Connect Glue. I really like how easy it is to use that glue and how good it works. I know this glue is out-of-stock frequently, but I managed to buy some more so hoping that my supply lasts awhile.

Thanks for stopping by!


SUPPLIES USED:
DIES: Altenew: Creative Edges: Lace Die; Spellbinders: Nestabilities: Circles & Scalloped Circles; MFT: Stitched Circles Stax; 
STAMPS: Simon Says Stamp: Sending & Wishing; Picket Fence Studios: Flowers For Picking; 
INK: Stampin' Up: Tempting Turquoise
PAPER: Stampin' Up
OTHER: Nuvo Crystal Drops: Bright Gold


Sunday, February 21, 2021

Congrats using SC841


I flipped the sketch and made a horizontal card. Used some single sheets of dp that I bought a gazillion years ago from a Scrapbook Expo when SEI was selling variety packs of their gorgeous 12 x 12 papers. It's always fun to dig out some old supplies - I forget what I have stashed away. Thanks to Splitcoaststampers for the inspiration! 


Supplies Used: 
Stamps: Close to my Heart: Celebration
Dies: Spellbinders: Card Creator A-2 Matting Basics A & B; 
Sizzix: Stars #2
Paper: SEI: Various
Ink: Memento: Paris Dusk
EF: Darice: Stars


Saturday, February 6, 2021

Sweet & Simple Valentine (#SC839)

Made this quick little valentine for my daughter who is experiencing her first year away at college. Valentine's Day can be lonely when you don't have a special someone, and the pandemic has really put socializing on hold, making it more difficult to meet people and just hang out. Hoping this little card (along with some homemade chocolate chip cookies) will brighten her Valentine's Day at least a little bit! Thanks for the sketch inspiration at Splitcoaststampers.com!

Inked and embossed the cute little cupcake stamp, then decided to mat it with several squares. Used the Mixed Sprinkles stencil for the larger square and some SU dp. Die cut some matching hearts, popped up the cupcake with foam dots and stamped the sentiment to complete this card. TFL!

Supplies Used:
Stamps: Picket Fence Studios: You Are Icons; Sunny Studio Stamps: Sweet Shoppe; MFT: You're the Sweetest
Dies: Hero Arts: Nesting Hearts Infinity Dies
Ink: Stampin' Up: Real Red; VersaMark; Red EP
Other: Altenew: Mixed Sprinkles Stencil


Tuesday, February 2, 2021

Joyful Christmas

I fell in love with this stamp set from the Stamp Simply Ribbon Store when I first saw it. I was so inspired by the designers' cards, that I was actually convinced that I could pull off making my own Christmas cards for 2020. That was way back in September when the illusion of having plenty of time made my goal seem like a realistic possibility. Fast forward to December, after which I had changed my mind at least half a dozen times, and there I was, stamping, embossing and coloring like there was no tomorrow. This was my first attempt at making a significant number of cards (50). It took way longer than I anticipated, but I was happy with the results. Still love the stamp set bundle. Motivated to do it again for 2021....promising myself I will start much early, though!

Once I decided on the design of my card and arranged all the pieces, the blank background was too boring for me. That's where a little bit of ink through a stencil added just the right amount of interest and color.  Since the stamp set contains only two ornaments and one string & one bow, the embossing took several iterations. The gold embossing really adds a classy look, so the effort was well worth it. Next, I had to color all of those tiny little diamonds....it took about 10 minutes per card to fill them all in! My Prismacolor colored pencils finally got a workout, and they didn't disappoint. Matted the panels on gold foil cardstock, which added another elegant touch. TFL!

Supplies Used: 
Stamps: Stamp Simply: Christmas Joy, Woodware: Sketchy Pine Branch
Inks: Distress: Mowed Lawn, Broken China; VersaMark; Stampin' Up: Real Red
Stencil: Picket Fence Studios: Points of Interest
Other: Ranger: Gold Embossing Powder, Prismacolor Colored Pencils, Nuvo Crystal Drops: Gloss: Red Berry

Wednesday, January 27, 2021

MOJOSKETCH552


 Created this card for the sketch challenge at Mojo Monday Sketch Challenge #552. I found this great background paper which I knew I could use for some Cooks/Bakers in my family. When I set out to make cards, however, I didn't have the right elements to go with the theme. I thought about drawing a chef's hat and some utensils, but then I found the perfect Stickers and everything sort of came together after that. I ended up making three cards, with more stickers to use for the future. I can't believe how easy it is to create a card when you have the Perfect Embellishments! TFL!


Supplies Used:
Paper: American Crafts; DCWV: The Sweet MatStack
Stickers: The Paper Studio
Dies: MFT: Stitched Circle Stax, Hero Arts: Nested Frame Cuts: Hearts
Other: Heidi Swap: Spray Stencil
Ink: Altenew: Grapevine

Sunday, January 24, 2021

SugarPea Fun


Christmastime always keeps me extra busy so I don't get the chance to post for awhile. Today I am trying to organize my photos and came across this colorful card that I made in early December. That Sugar Pea Designs stencil is so fun! Pairing it with the Greatest Hits Stamp Set, makes a great card come together quickly. I love that this set is so versatile - the theme applies to various ages and tastes. I do miss owning vinyl, but since I managed to build up a collection of over 200 CDs, there's no way I can afford to replace them all with vinyl. Probably quite a few couldn't even be found anymore - either on CD or anywhere. I researched an obscure local band and was excited to find a CD for sale - but it was over $900!! Sigh. Guess you have to buy while they're hot in case they go underground and are just a memory to those that got to see the band live. Ah, those were the days....

I'm looking forward to making lots more cards while we continue hunkering down at home, staying safe  and patiently waiting for vaccines to roll out. Thanks for stopping by!

Supplies Used: 
Stamps: SugarPea Designs: Greatest Hits 
Ink: Various Distress Oxide; VersaFine Onyx Black
Dies: SugarPea Designs: Greatest Hits
Other: SugarPea Designs: Concentric Circles Stencil; Clear Embossing Powder