Translate

Showing posts with label DCWV. Show all posts

Saturday, May 4, 2024

Sweet Little Lady Bugs


Made this to congratulate my nephew and his wife on their new baby girl. I needed a quick & simple card design because I have a ton of May birthday cards to make so I am pressed for time. Love the sketches at FMS, they are always so inspirational!

Supplies Used:
Paper: DCWV: the Sweet Matstack
Stamps: Altenew: Sentiments & Quotes; Stamps By Judith: Flower
Other: Cuttlebug: Swiss Dots EF; EK: Open Scallop Border Punch; Sparklensprinkle: White & Rosa Embossing Powders
Ink: Distress Oxide: Twisted Citron; Hero Arts: Unicorn; VersaMark


Saturday, April 25, 2020

A Bunch of Birthday Wishes

Spending my "Sheltering At Home" Time in my Craft Room, adding to my stash of birthday cards. I'm really making good use of the DCWV paper pad called 'The Birthday Wishes Stack'. All of the papers are so cute just on their own, yet I still managed to embellish them all (even though I only added tiny enamel dots to the last one). I had so much fun making these bright and happy birthday cards! My 30 year old nephew got a big kick out of the card with his baby picture...hope the other cards can also bring smiles to the yet-to-be-named recipients! Thanks so much for stopping by!

Supplies Used: ODBD: Ballons & Streamers, SSS: Wishing

Supplies Used: MFT: You're the Sweetest, Penny Black: YAY, Spellbinders: Classic Edges One, Brutus Monroe: Birthday Surprise Faux Sprinkles


Supplies Used:Sizzix: Stars #2, Graffiti

Supplies Used: Sunny Studio: Sweet Shoppe Stamps and Sweet die, Lawn Fawn: Here's the Scoop Stamps and Dies, Copics, TPS: small scallops scissors

Supplies Used: Nuvo Crystal Drops: Carnation Pink

Saturday, February 1, 2020

Holographic Wishes


Entering this in the SC786 Challenge at Split Coast Stampers. Thought this would be super-quick because I used a panel I created some time ago, but as usual, it took some time to decide on which papers to use (I love that Stargazer paper!) and how to add the sentiment. I ended up using only part of the sentiment 'wishing you a lot of' so that I could simply add 'Happy Birthday' inside. I bought the holographic paper on clearance, and I can't help myself from always using it for any star. Thanks for stopping by!


Supplies Used:

Paper: The Paper Studio: Stargazer Foil Pad, DCWV: Holographics Mat Stack
Dies: Sizzix Originals: Stars #2, Sunny Studios: tiny double star, Simon Says Stamp: Fancy Frame Rectangle
Stamps: Simon Says Stamp: Happy 3x4
Ink: Distress: Fired Brick, Faded Jeans, Iced Spruce, VersaFine Onyx Black
Other: Perfect Pearls, Altenew Cube Builder Stencil

Monday, July 31, 2017

CTS #232

Used the sketch at CAS(E) this Sketch! to create this quick birthday card. It's hard for me to make such simple cards but these sketches really help! Colored the balloons with Copics using the technique I found here to make the balloons look transparent.Couldn't just have a white background, so I embossed some yellow cardstock with a stars ef which added some interest. Immediately after embossing though, I realized I should have stamped the sentiment first. Ugh. Actually, this turned out to be a good mistake because I really like how the blue strip added another pop of color. Added faux stitching to the sentiment and popped up the balloons and put this card in the mail! TFL!

SUPPLIES USED:
Stamps: Stampendous: Party Balloons, My Favorite Things: You're the Sweetest
Ink: Copics, Memento Tuxedo Black, SU Tangerine Tango, White Gel Pen
Paper: DCWV: The Birthday Wishes Stack
EF: Darice: Assorted Stars

Friday, May 12, 2017

Pretty Pink Treats


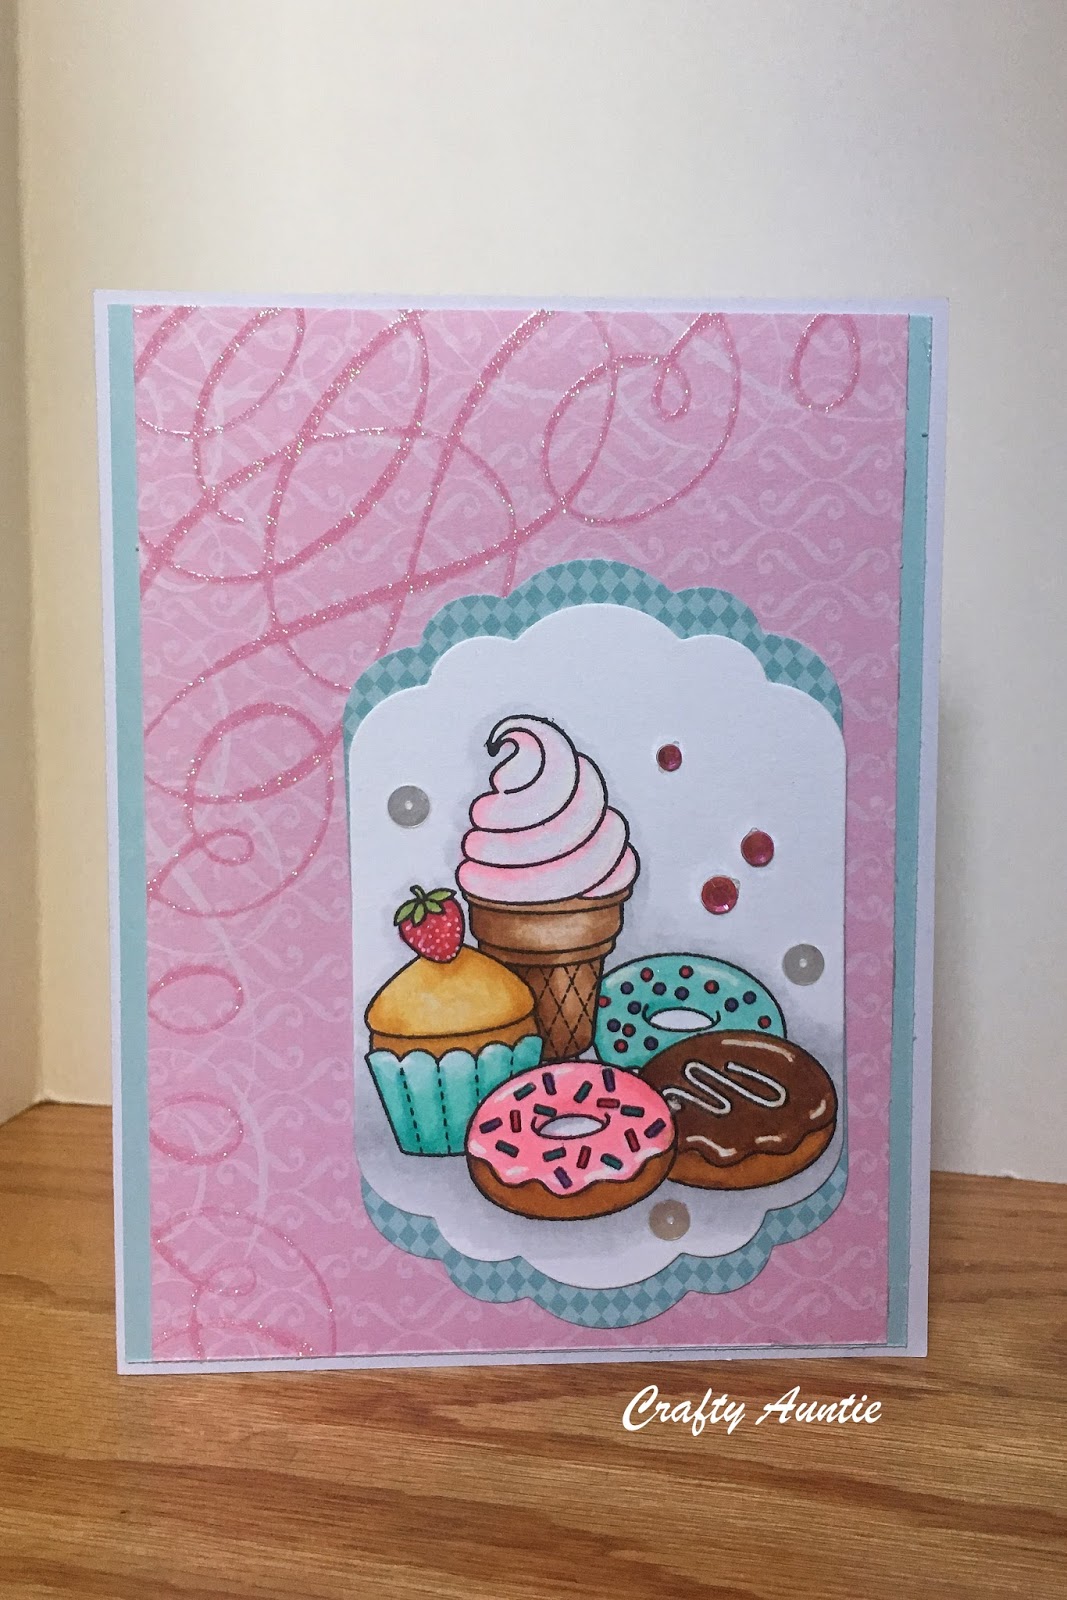
Made this sweet card today using Sunny Studio's Sweet Shoppe Stamps. Love using the mint and pink papers with these stamps! I tried something rather new for me when making the mint scallop edge: The large image only fit inside the largest label die, but I still wanted to mat it. So, I only partially cut the mint background paper, then moved the die and cut a second time, thus extending the label. I know you can't see the side edges, but they actually are perfectly lined up! Oh - I guess that means I could have just die cut the whole label then cut it in two to reposition it so that just the edges extended...duh! Oh well, now I know I can actually do the fancy extended cut which may come in handy another time! I colored the image with my copics, but I still need lots more practice. I like how I was able to get a really light pink by using the colorless blender to pick up RV21 that I scribbled onto an acrylic block. I don't know why I left the cupcake unfrosted, and I still have to work on the highlights, but overall I don't think it's too bad. 

Supplies Used:
Stamps: Sunny Studio Sweet Shoppe
Dies: Nestabilities Labels Eleven
Paper: DCWV Sweet Matstack, MFT Sweet Celebration, Recollections Blue Ombre
Ink: Memento Tuxedo Black, Copics, White Gel Pen, Wink of Stella